Internationalization and localization are two different concepts, the former makes your app support other languages and the latter adds languages to the app.
Internationalization
To make an app support different languages easily, some configurations must be made first.
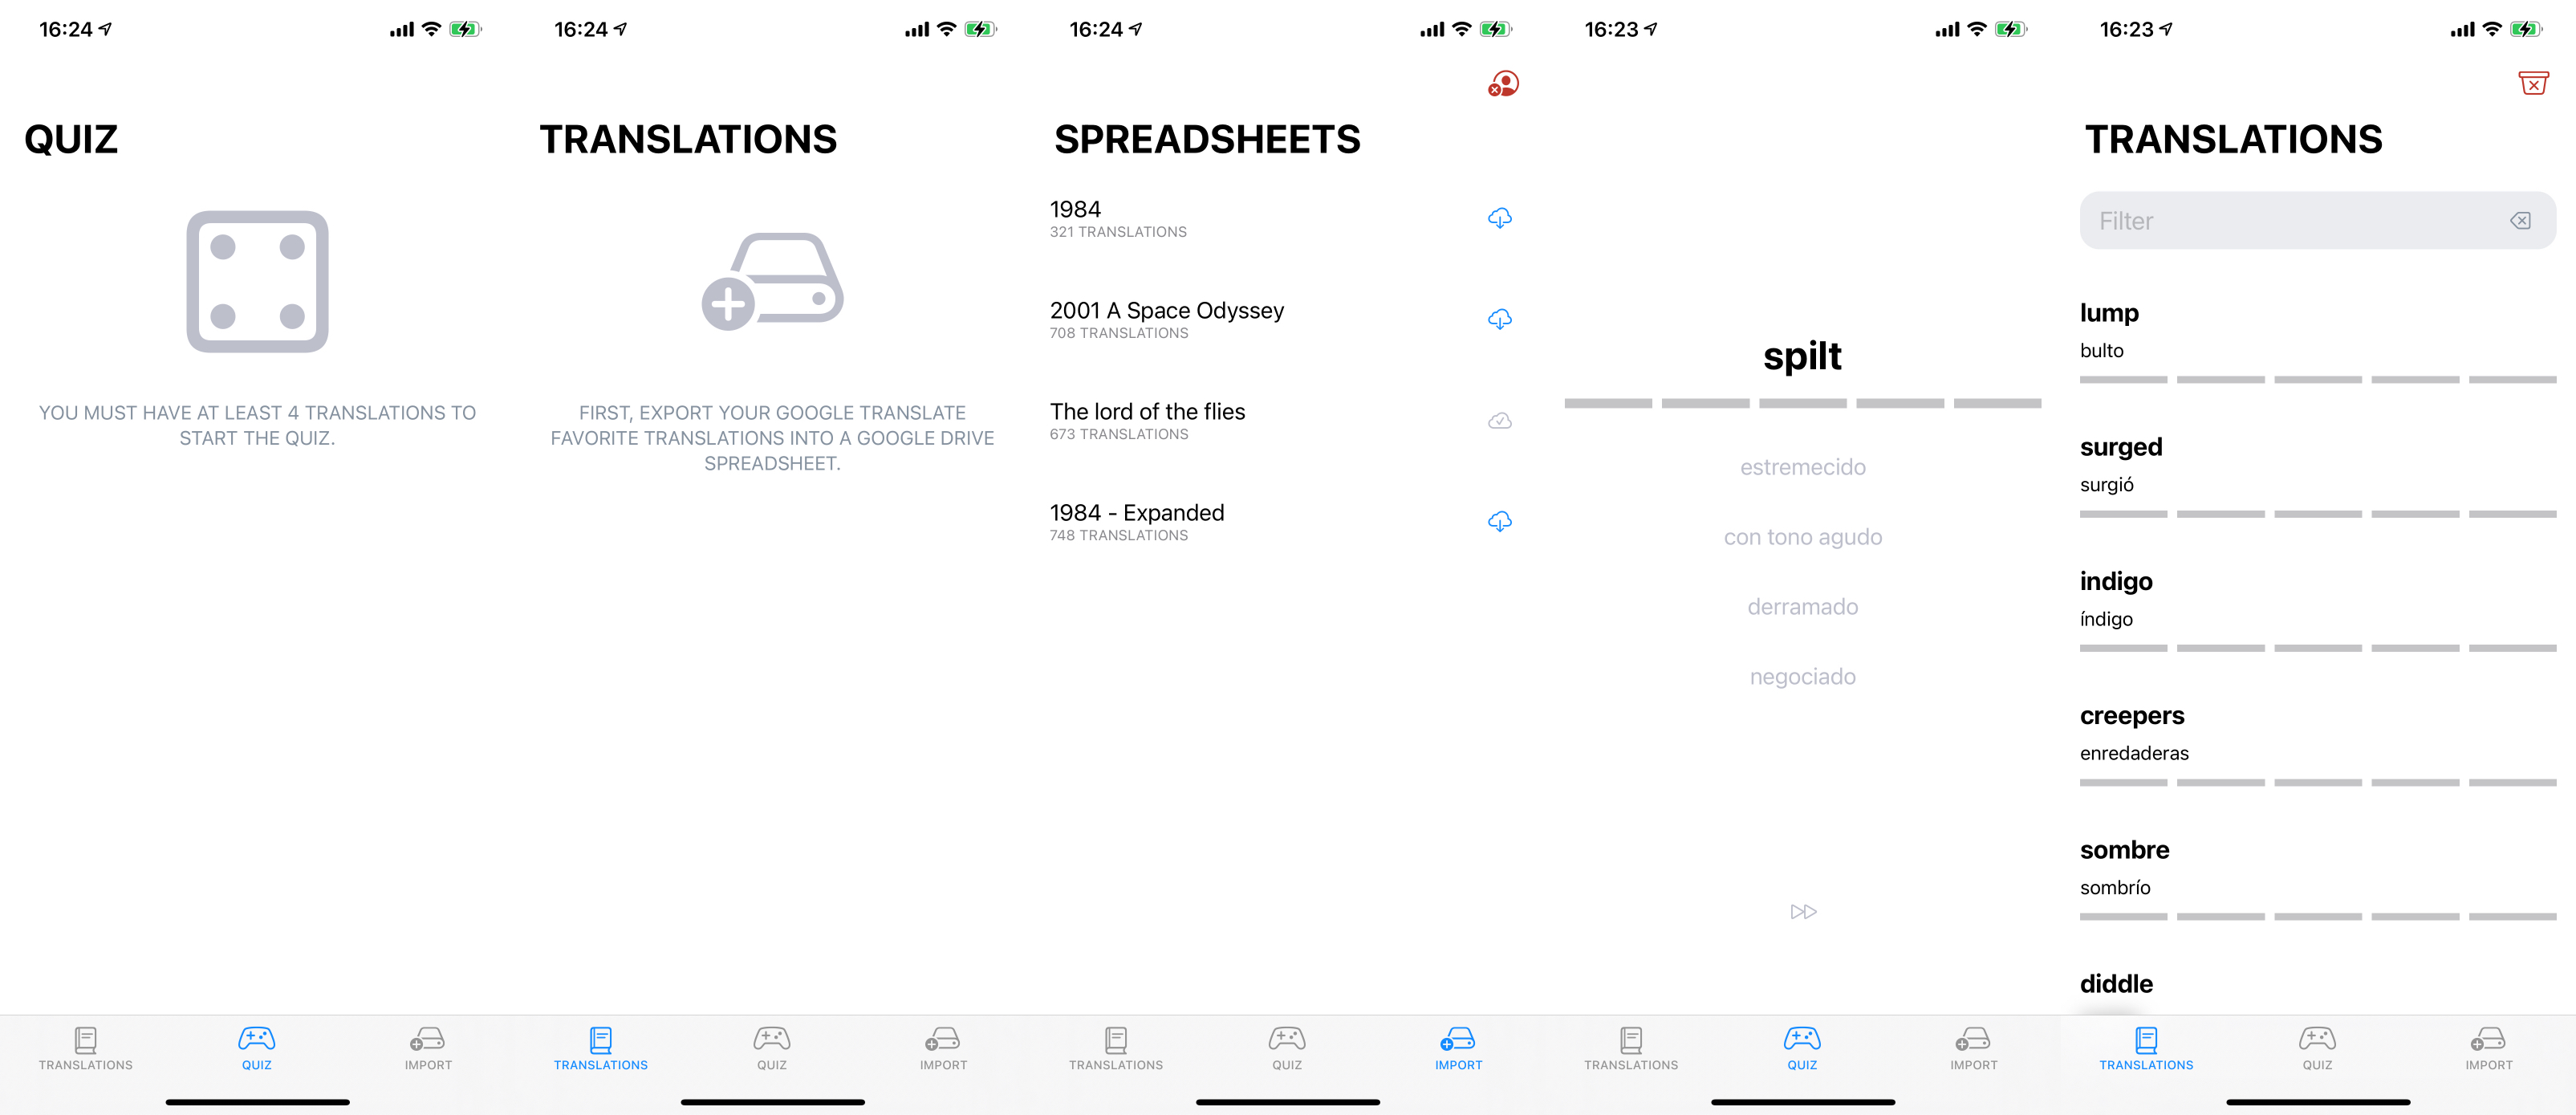
To identify the texts that are not localized, open the “Run options” menu ⌥ + ⌘ + r and check “Show non localized strings”.
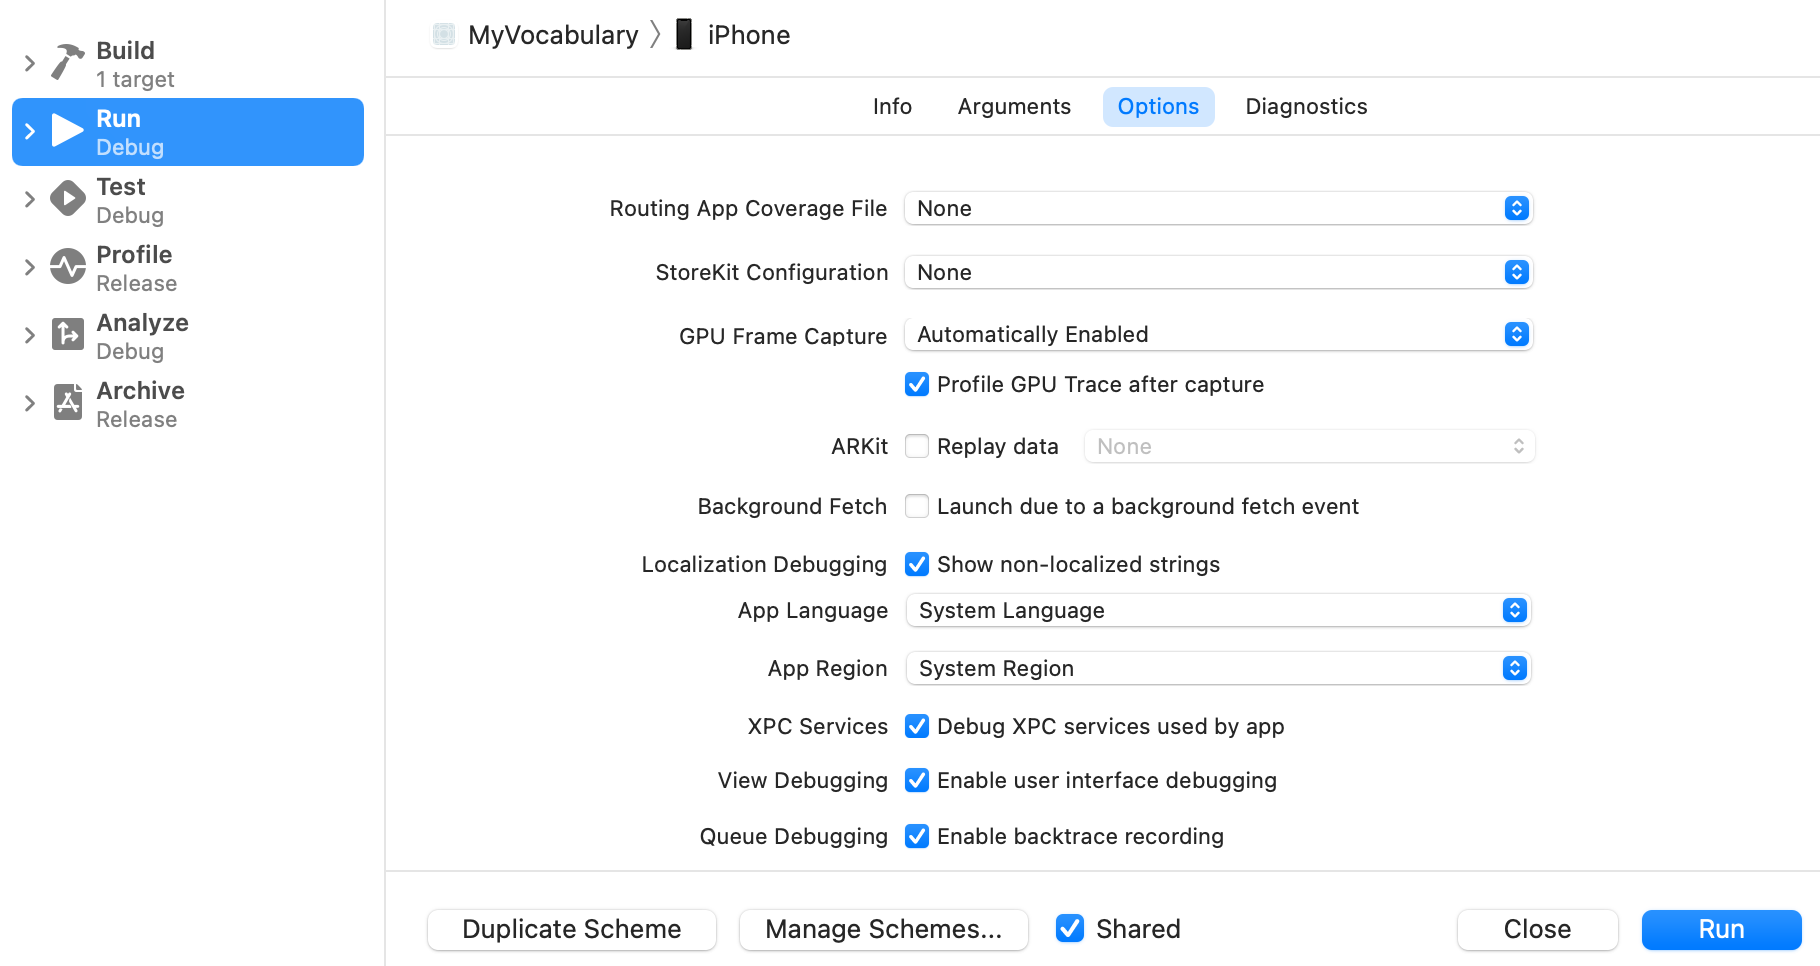
This will uppercase every text that has not been localized, with some exceptions:
- Those texts that are obtained from the model (user data) won’t be localized, take a look at the translated words and phrases in the screenshot below.
- Texts that are calculated programmatically, instead of being hardcoded directly, take a look at the word “Filter”.
    // ...
    private var placeholder: String

    init(placeholder: String, /* ... */) {
        self.placeholder = placeholder
        // ...
    }

    var body: some View {
        VStack(alignment: .leading) {
            HStack {
                TextField(placeholder, text: $searchString)
    // ...
Localizable.strings
Initially, I added all the strings in English, now I am going to support another language, Spanish.
First of all, add a Localizable.strings file to your project.
In the main directory of your project, run in Terminal:
find . -name "*.swift" | xargs genstrings -SwiftUI -o ~/Desktop/
This command will generate another Localizable.strings file and it will place it in the desktop, just copy/paste its content into the Localizable.strings of the project.
Run the app again, the texts are not uppercased anymore. That means that is localized!
Errors
Some texts may not be included in the Localizable.strings file, for example, the word “Filter” should not be included in it as it was not uppercased in the previous step.
The solution is to use LocalizedStringKey instead of String to pass strings as parameters that must be translated.
    // ...
    private var placeholder: LocalizedStringKey

    init(placeholder: LocalizedStringKey, /* ... */) {
        self.placeholder = placeholder
        // ...
    }

    var body: some View {
        VStack(alignment: .leading) {
            HStack {
                TextField(placeholder, text: $searchString)
    // ...
Now, run again the app and check that the word is not uppercased anymore. Xcode logs should print:
[strings] ERROR: Filter not found in table Localizable of bundle CFBundle
To solve this, the only solution is to add manually the string to the Localizable.strings file:
"Filter" = "Filter";
Plurals
A string went unnoticed because it was uppercased before the Show non-localized strings option was checked:
var numberOfTranslationsString: String {
    String(format: "%d translations", translations.count).localizedUppercase
}
It wasn’t included in the Localizable.strings file but it did not appear in the Xcode logs either. Doing this:
/// Text that expresses the number of translations that contains the spreadsheet.
var numberOfTranslationsString: String {
    String(format: NSLocalizedString("%d translations", comment: ""), translations.count)
}
The localizedUppercase has been removed but, running the app, the string is still in capital letters. At least, the system is noticing that the string is not localized, thanks to the NSLocalizedString.
But what does this string have to do with plurals? Well, each spreadsheet can have a different number of translations and the text is not the same for 1 than for 2 or more, a lot of languages work like this:
1 TRANSLATION
2 TRANSLATIONS // As you see, there is a difference, not only on the number.
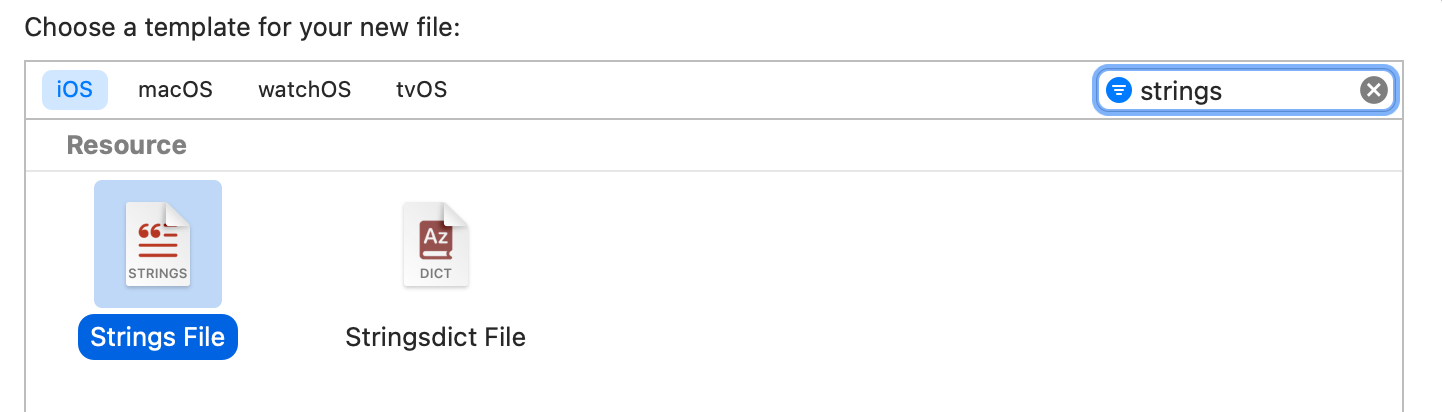
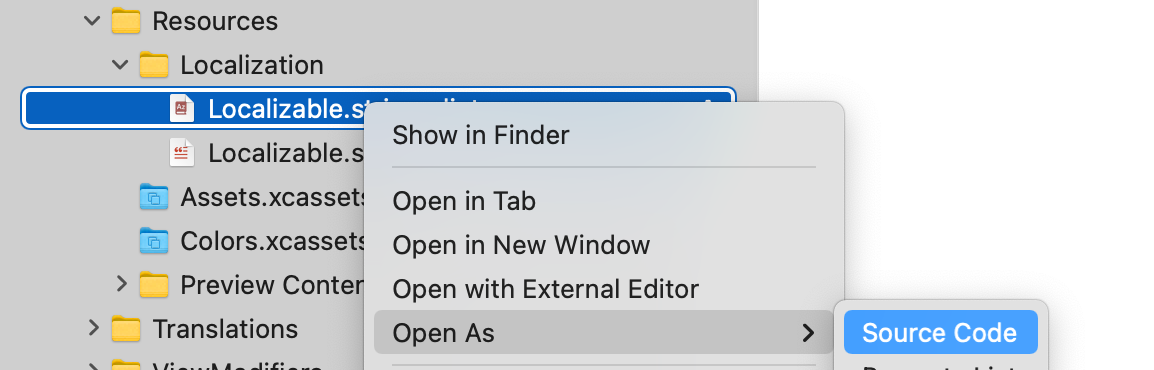
To support plurals, add a stringsdict file:
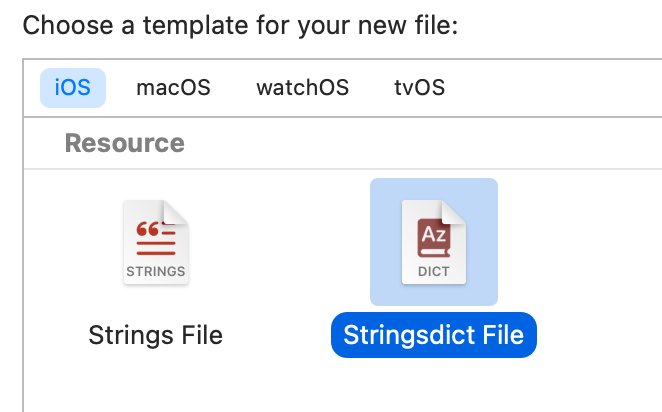
Open it as an XML file:
It must contain this:
<?xml version="1.0" encoding="UTF-8"?>
<!DOCTYPE plist PUBLIC "-//Apple//DTD PLIST 1.0//EN" "http://www.apple.com/DTDs/PropertyList-1.0.dtd">
<plist version="1.0">
<dict>
    <key>`StringKey`</key>
    <dict>
        <key>NSStringLocalizedFormatKey</key>
        <string>%#@VARIABLE@</string>
        <key>VARIABLE</key>
        <dict>
            <key>NSStringFormatSpecTypeKey</key>
            <string>NSStringPluralRuleType</string>
            <key>NSStringFormatValueTypeKey</key>
            <string></string>
            <key>zero</key>
            <string></string>
            <key>one</key>
            <string></string>
            <key>two</key>
            <string></string>
            <key>few</key>
            <string></string>
            <key>many</key>
            <string></string>
            <key>other</key>
            <string></string>
        </dict>
    </dict>
</dict>
</plist>
After replacing StringKey with the actual key, in this case is %d translations, adding d as the string for NSStringFormatValueTypeKey…
<key>NSStringFormatValueTypeKey</key>
<string>d</string>
… and adding a string for the cases zero, one, and other …
<key>zero</key>
<string>No translations</string>
<key>one</key>
<string>1 translation</string>
<key>other</key>
<string>%d translations</string>
This is the result! 😁

At this point, the app is fully internationalized.
Localization
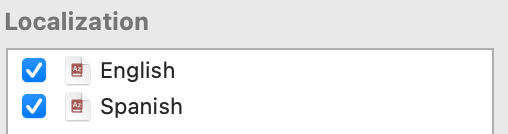
Go to Project > Info tab > Localizations > + > Language, in my case, I added Spanish, so it looks like this:

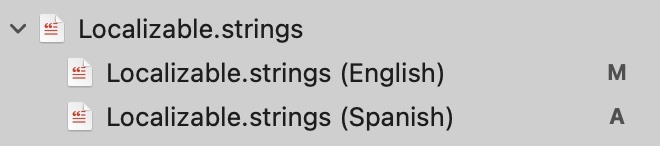
By unfolding Localizable.strings, both languages appear. Opening the second language file and replacing the texts will localize the app!
"Delete all imported translations" = "Borrar todas las traducciones importadas"; // For example
stringsdict
For plurals is a bit different. The Localizable.stringsdict file must be selected to open its File inspector, you can use the shortcut ⌥ + ⌘ + 0. By selecting Localize, Xcode will prompt which language must be supported, after selecting one, it should look like this:
As done in Localizable.strings, the texts must be replaced to match the new language. But the key StringKey must remain the same.
Accessibility
In the previous section, where I talked about accessibility, some accessibility labels had this format:
.accessibilityLabel("\(translation.translationInput) in \(translation.translationFrom), \(translation.translationOutput) in \(translation.translationTo) . Level \(translation.level).")
This kind of strings, must be added with placeholders to the Localizable.strings file and everything should work fine:
"%@ in %@, %@ in %@ . Level %d." = "%@ en %@, %@ en %@ . Nivel %d.";
Always remember to translate all the accessibilityLabel and accesibilityHint 😁